Can you Build a Hoophouse on a Slope?
This is the question I asked myself when I decided to start The Farmlet here on 1/4 acre. If you are asking yourself these same questions I feel you! Since you don’t have the ‘perfect’ site for a tunnel I will take you through some things to think about. A good starting point is to watch this YouTube video I prepared, But I have created this blog post as an additional resource to accompany it and go a bit deeper into the weeds, share examples, and external links to further reading for you to peruse!
Tunnel Orientation
When you are stuck with a sloping site for your tunnel, it is preferred to build parallel to the slope (“on contour”). So that the biggest elevation change is happening on the gable end (short) of the tunnels. However, if your land is a north facing slope you may want to reconsider growing or building a tunnel there at all due to the lack of sunlight availability in the winter and shoulder seasons. Sometimes our layout and site is restricted by other roadways or buildings or just general good layout design and you might find yourself stuck with the option to build perpendicular to the grade which is likely to be fine under 5% slope conditions. Factors like the type of kit you purchase (square or round tubing?) will become a factor as your bows are in essence ‘stair stepping’ down the hill. Each of your ground posts will be cut level, but slightly lower than the uphill one in sequence following a string line down the length of the structure.
Choosing Your Options: Go with The slope? Caterpillar? or Build Level?
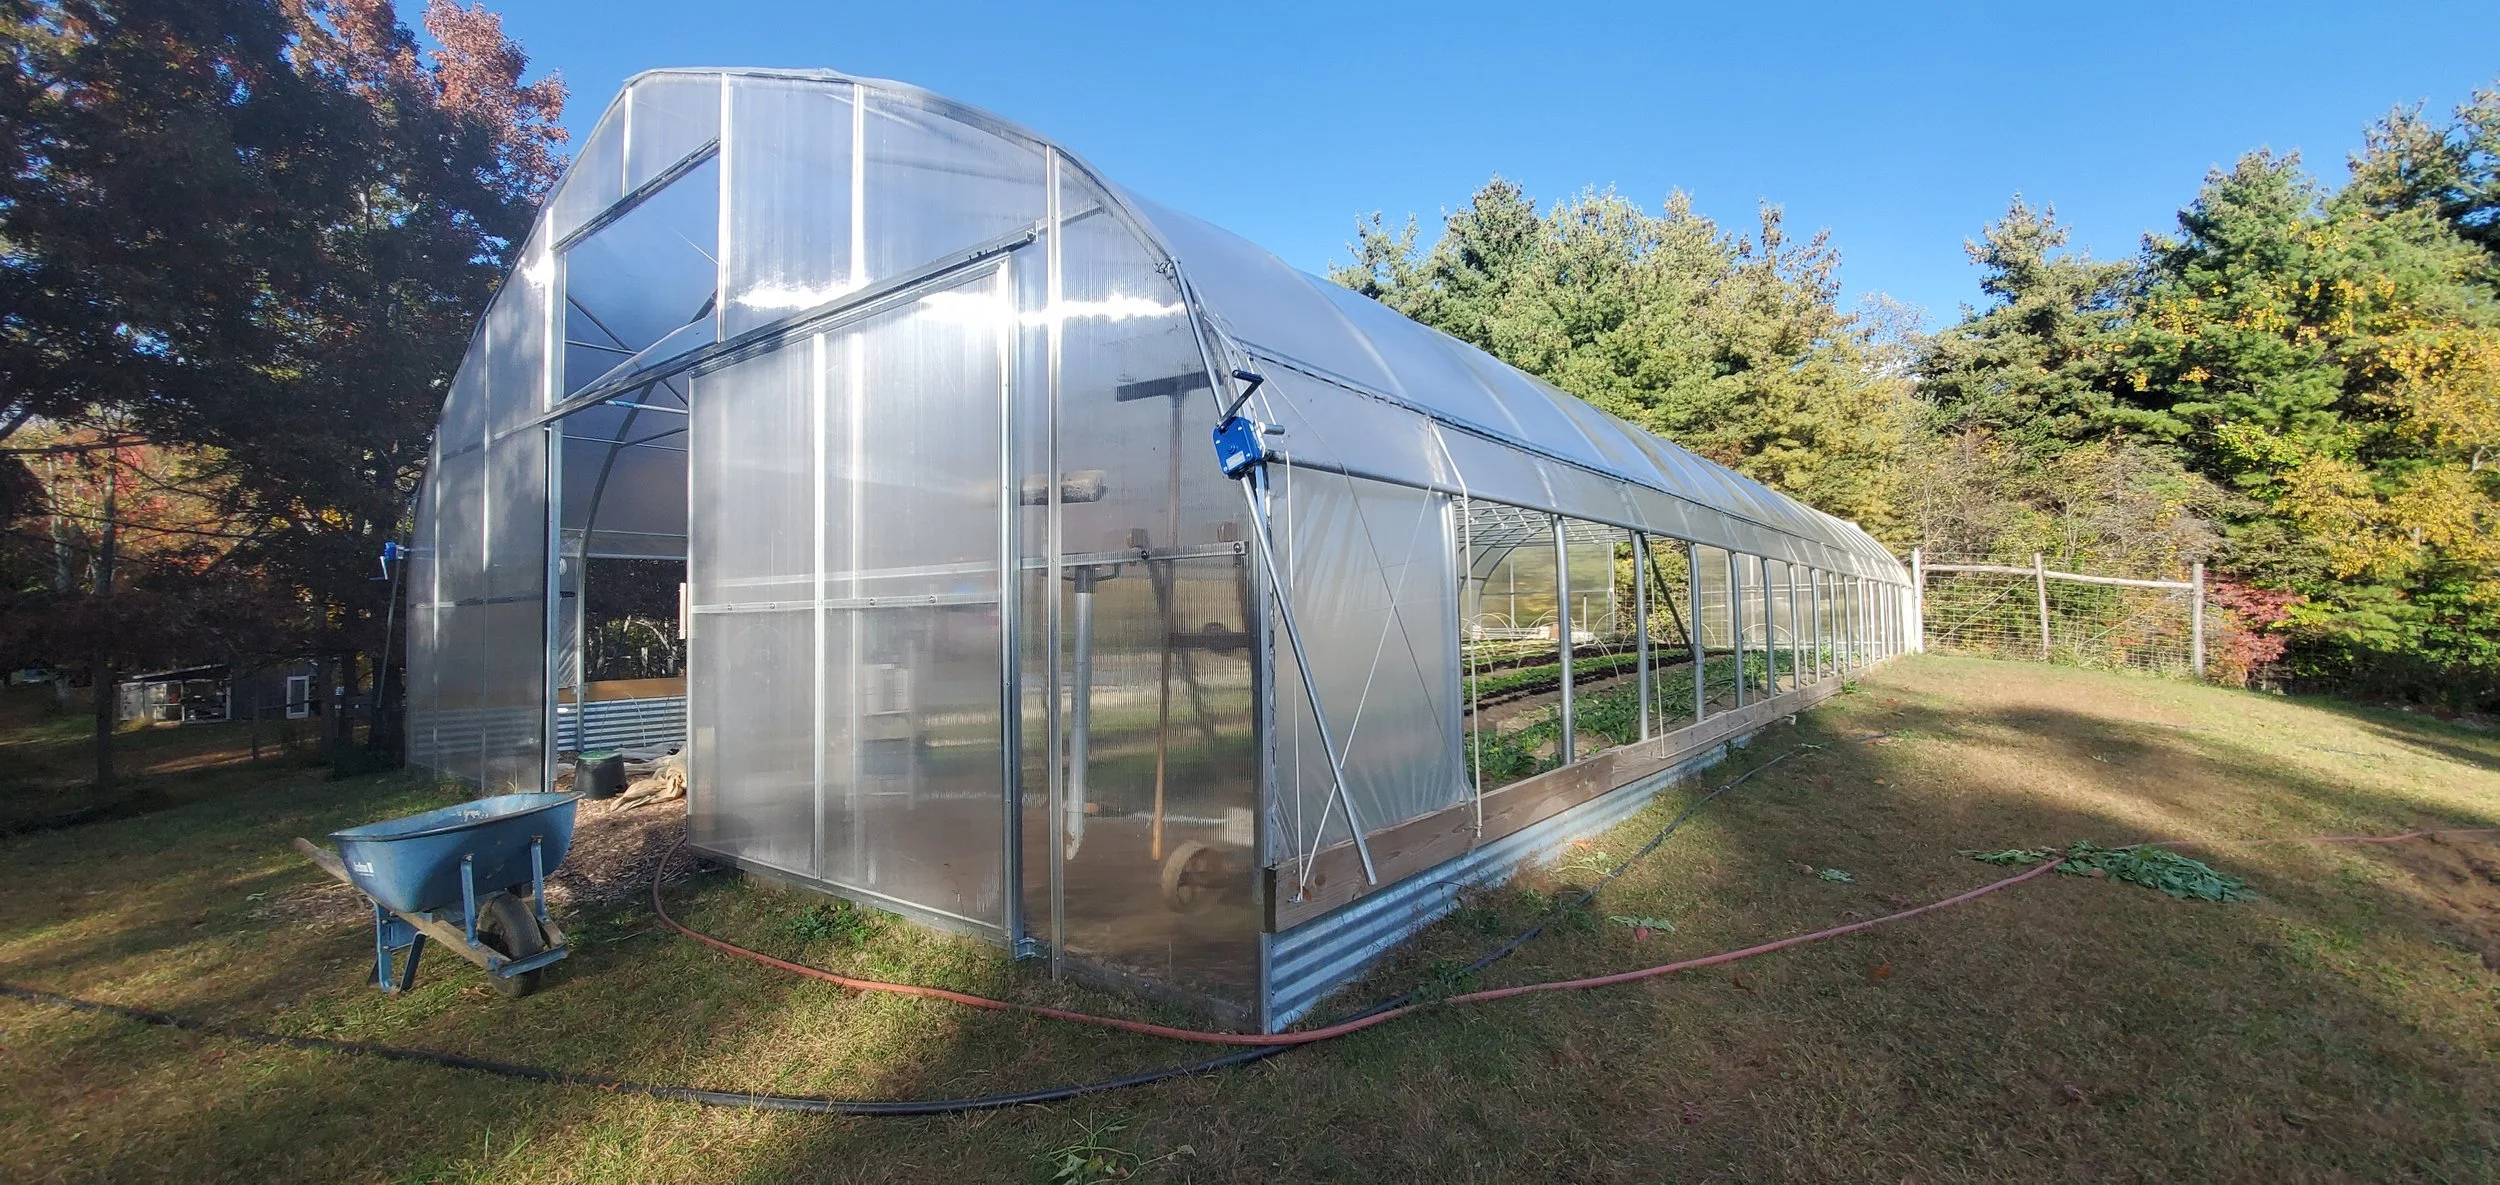
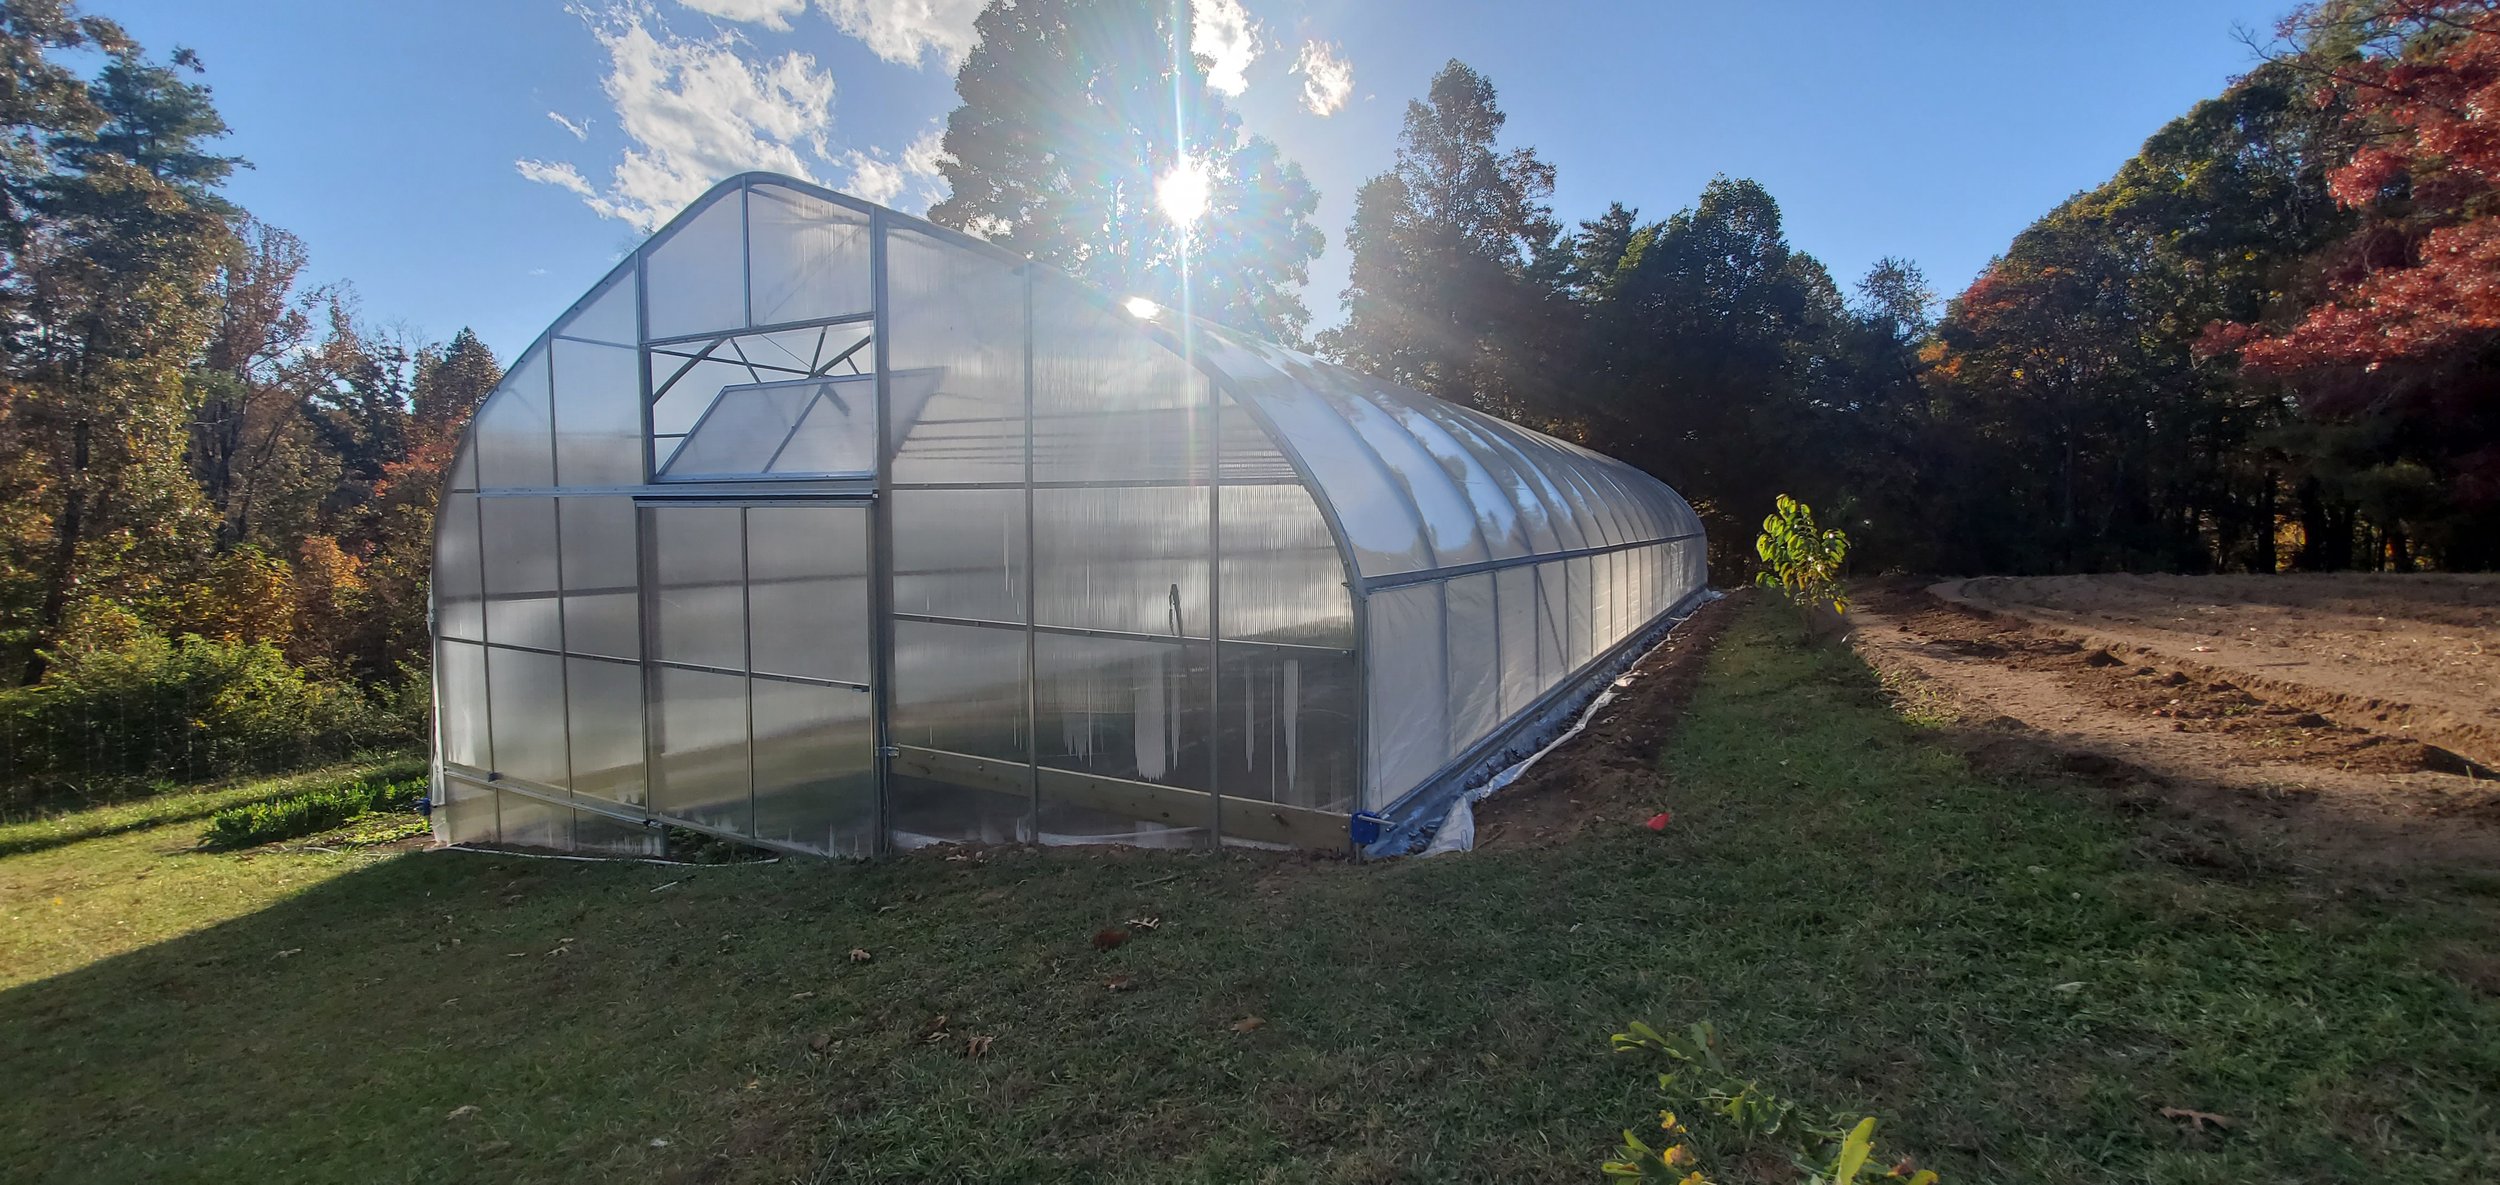
These might seem like the first questions to grapple with. Depending on the type of tunnel, one option might be the best to go with. Talk with your tunnel manufacturer to identify your true options. On my farm, knowing I was going to install sidewall curtains and 8’ endwall doors led me to go with ‘level’ as my option. But I could have followed a slight slope, too much slope and the side curtains might not roll up correctly. A little slope might be beneficial for guiding water in one direction, or if you choose to put gutters on your tunnel, some slope makes for good runoff.
Some tunnels, which are more temporary in nature like Farmers Friend caterpillar tunnels, low tunnels, or Haygroves are fine for ‘caterpillaring’ or sloping grades. They may even work OK on a subtle curve too. If you are getting a gothic peaked tunnel (rather than rounded), it is still imperative that you make the peak level from side to side, especially if you want the structure to stand up in snowy conditions.
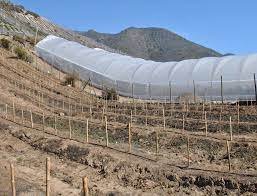
‘Haygroves’
These tunnels are designed to follow the undulations in the contour. Aka “caterpillaring'“
Passive exhaust with Convection Currents?
In the summer, greenhouses, and hoophouses need ample ventilation to move the hot moist air out of the structure. Since hot air rises, adding an outlet (a vent) at the high side of your structure and allowing the warm air to flow out the top, while pulling cooler air in from the bottom will create good passive exhaust for that hot air. I’ve added a link to a resource below where you can dig deeper into that idea.
Special parts needed
After you calculate your slope in both directions and the elevation change between each of your four corners, you can take that information to your tunnel manufacturer.
Will you need longer or shorter groundposts?
Will you need different doors
Will you need different endwall framing materials?
What kind of sidewall curtains are you getting, and will those work within your design.
Managing runoff, drainage and seepage. “Oh my!”
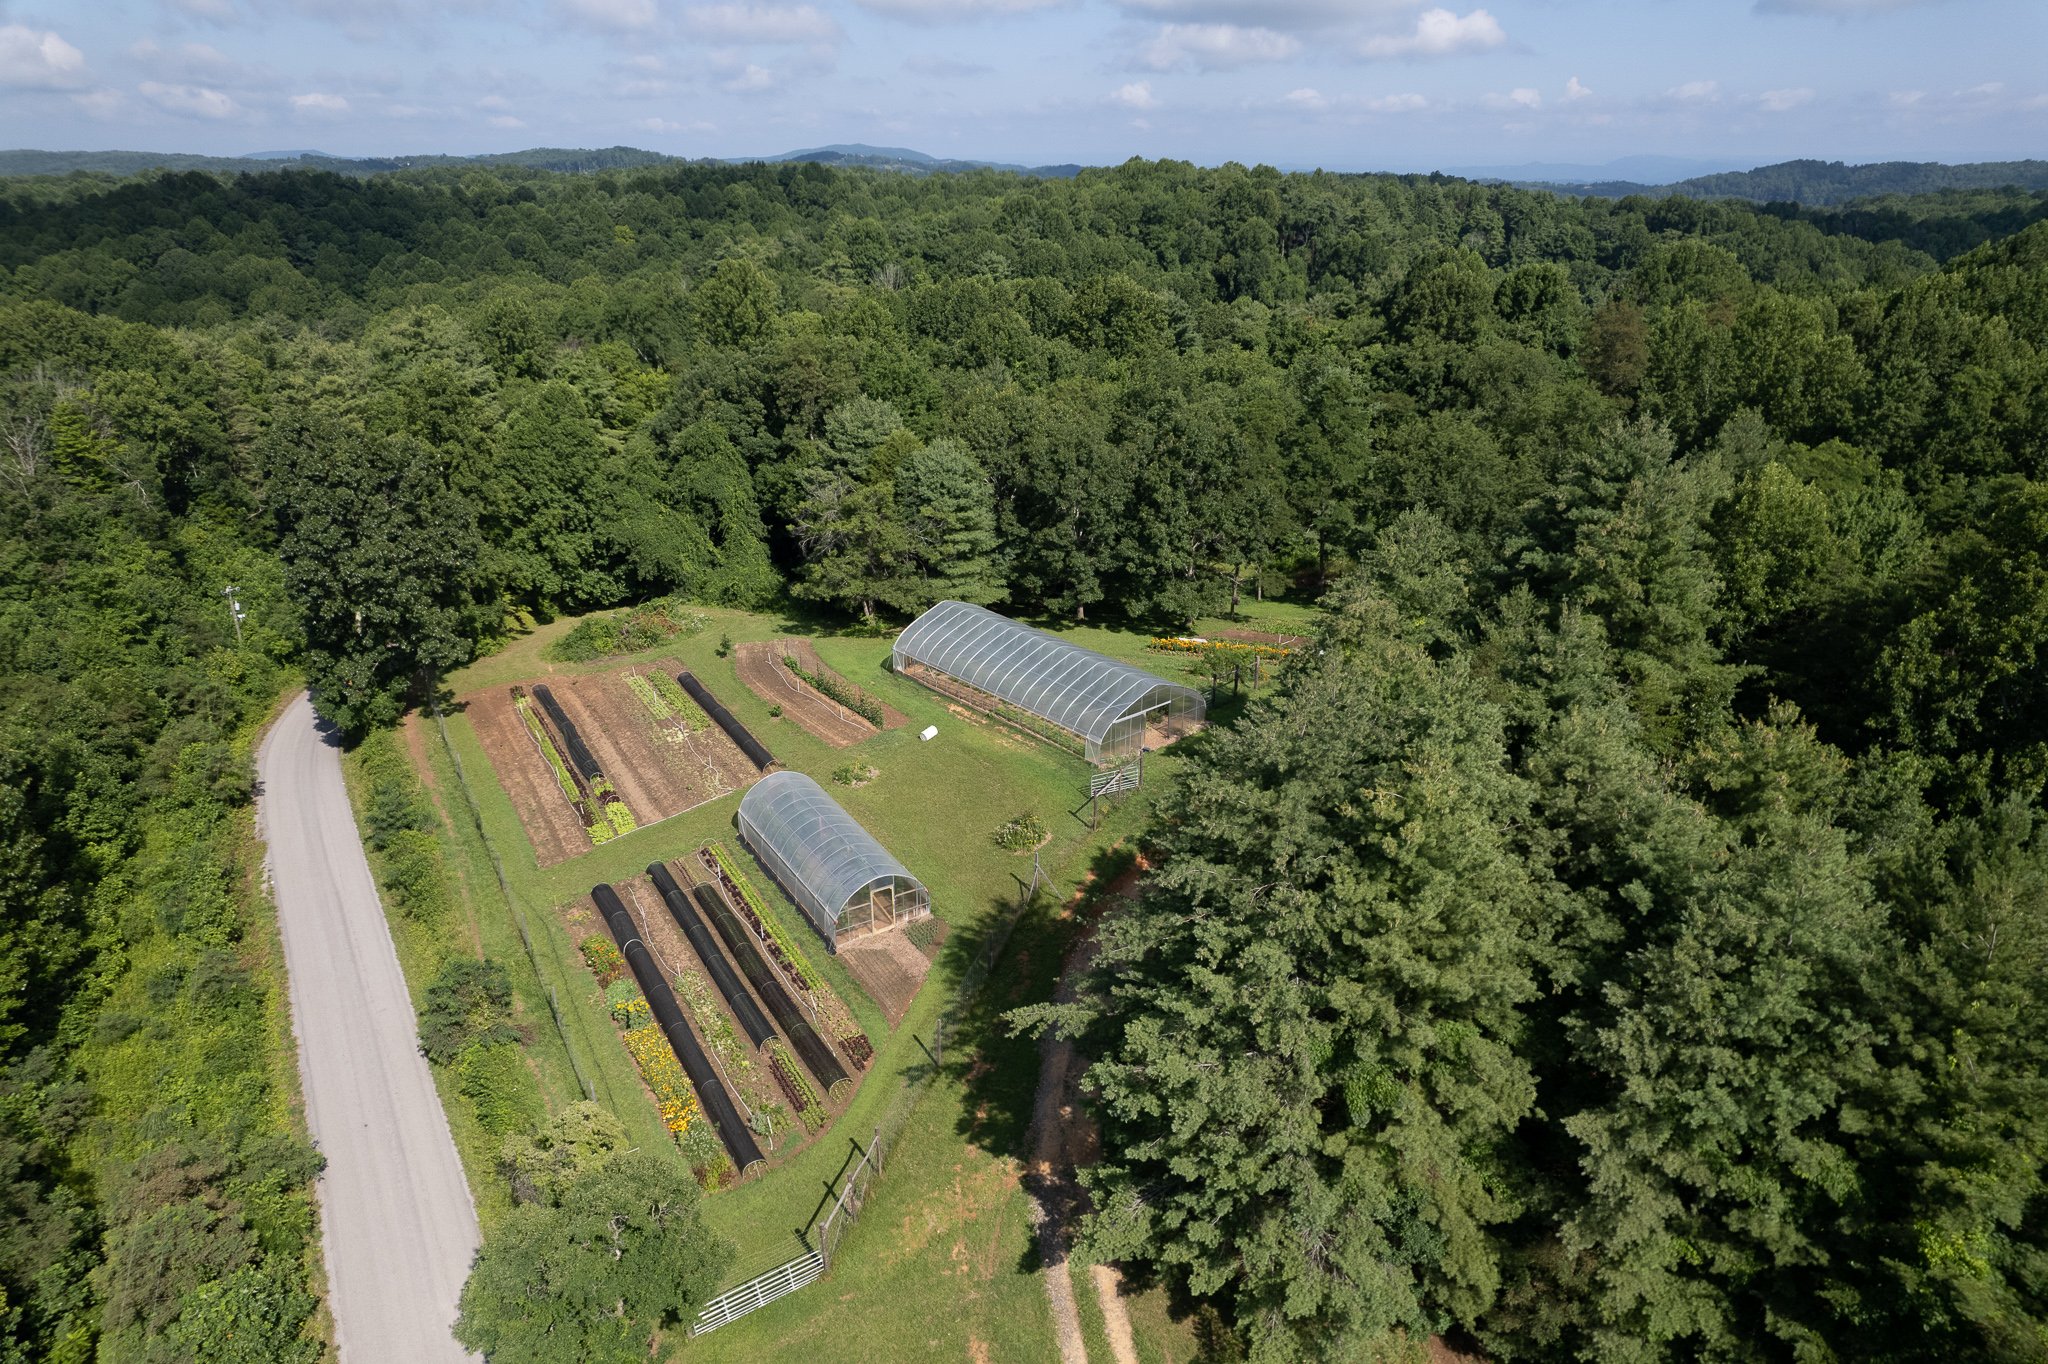
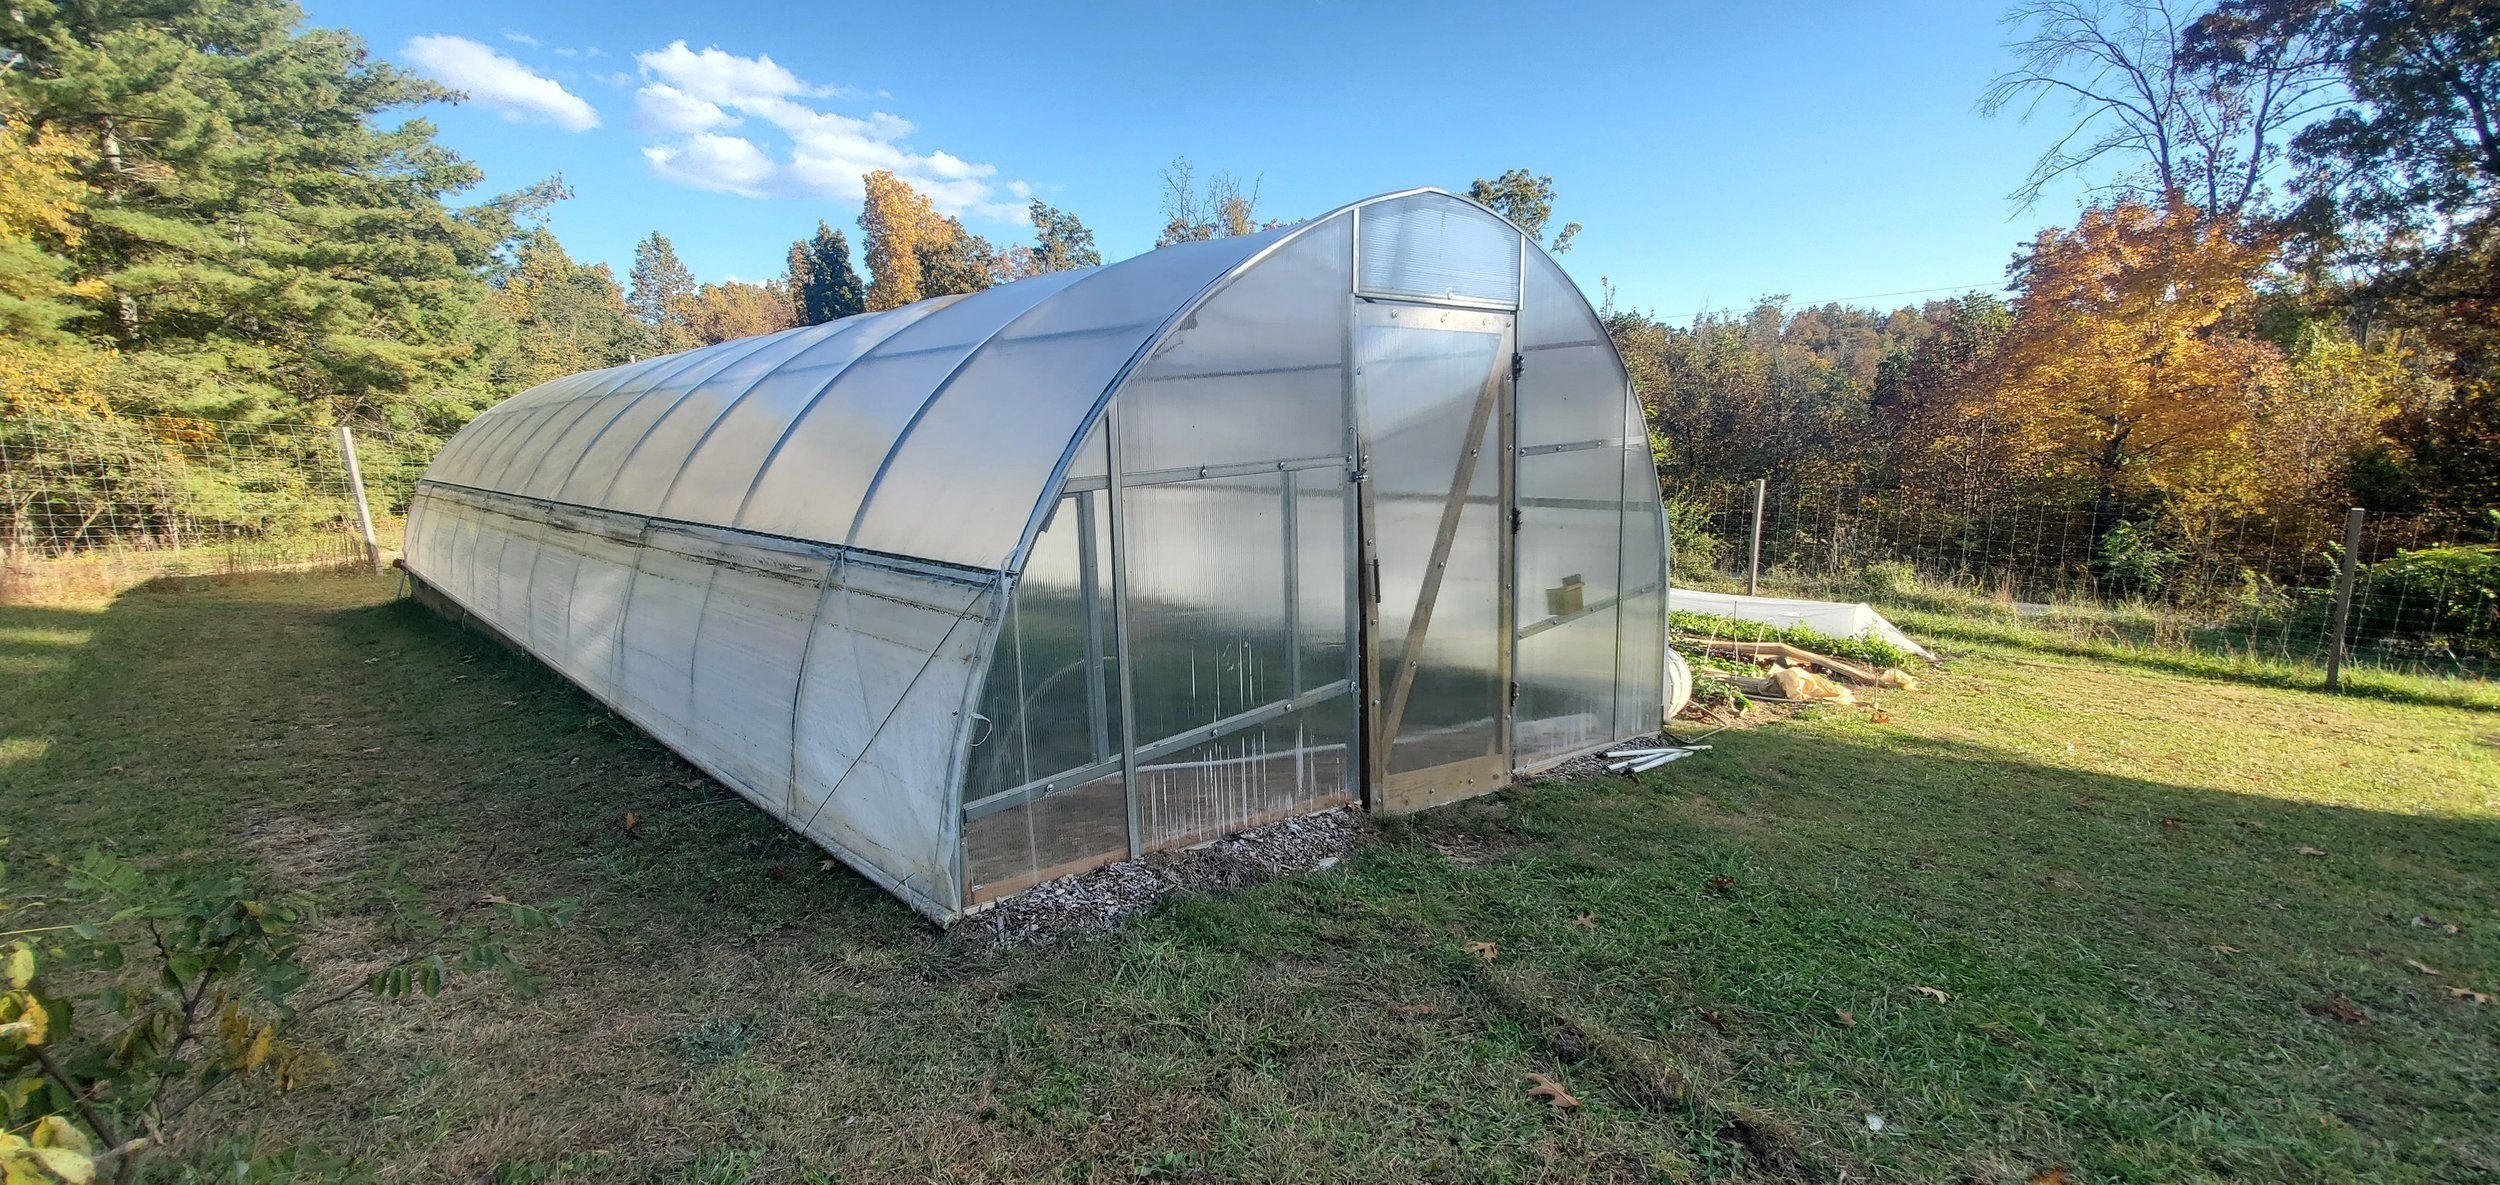
Chances are you are already growing food on the slope you want to put a new tunnel on. Maybe controlling water without a tunnel is already a challenge (or maybe its just fine) but with the addition of a roof, the water runoff will be concentrated to both sides of the tunnel and need a place to go. Put yourself in the shoes of the raindrops- imagine where is the path of least resistance. Ask yourself if there is a larger water catchment area (perhaps a hill above you, or a long valley, or a roadway) that will also be flowing towards the tunnel in heavy rain events. Now your job is to make sure to protect your crops from the potential damage that water could do. You need to give the water a route around and away from your tunnel. I have most commonly seen farmers use grading to create ‘earthen gutters’ that direct water out and away. On my farm, one tunnel is on relatively high ground, so earthen gutters worked just fine. I still get a little seepage of moisture coming in on the sides, but not extreme. On my other tunnel that sits on a 16% slope, it sits on sandy land, and doesnt have a large water catchment area above it (aside from the tunnel roof itself!) but without a gutter on the uphill side half of the water running off the house would inundate the upper beds and create gullies through the beds. So I installed a layer of greenhouse plastic, then added perforated drain pipe (in a ‘sock’) and then gravel and covered the top with gravel and landscape fabric to keep the weeds from rooting down into it and avoid the need to mow directly against the structure.
To Grade or Not to Grade?
Since most of the information about building tunnels (or anything really!) recommends starting with a level pad, you might receive a lot of recommendations from folks telling you to grade the site. If you do this, consider conserving the topsoil so that you can replace it once finished. Consider working in such a way to limit compaction, and if compaction is inevitable maybe you will need to plan for a window of time to grow cover crops to heal and amend the soil before beginning your cash crop production. Also consider where all your extra soil will go, and how extreme the excavation on the uphill side will be. For instance with my tunnel on the 16% slope- had I decided to carve out or build up the site to make a level pad- I would have ended up with a need for a retaining wall, or a graded in such a way to allow me to mow safely all the way around it all the while managing for water run off. If you cant mow or prevent weeds from growing up all the way around your tunnel, they will find a way to grow and prevent airflow across the structure or get tangled in your sidewall curtains. It gets messy!
I chose not to bring in equipment to grade the land because I had seen two different tunnels that were put up on graded land and took a long time to recover from having their soil disturbed in that way. I had beds within 1-3’ on either side of my tunnel and I didn’t want to lose that extra growing space after putting up another tunnel either.
Considerations for making your build easier
For extreme changes in elevation you may want to consider making your tunnel a shorter length or a skinnier width to help lessen the change in groundpost length needed within the tunnel.
The NRCS’ EQIP Tunnel Grant Qualifications
If you don’t know about the NRCS EQIP grant and you are considering building a tunnel, you should definitely look into it. It provides a costshare that can cover all or part of the cost of putting up a hoophouse on land to prevent erosion. The cost is allotted on a per square foot basis (so building on a slope gets you a few extra square feet!) that changes from year to year. I was able to secure the grant for my tunnel which was built on a 16% slope. This surprised me because I saw in an NRCS fact sheet that they don’t recommend building on more than a 5% slope…however I confirmed the slope with my agent many times ahead of time and it did not present an issue. Perhaps it is more of a recommendation than a restriction?
My Tunnels on the Farmlet
External Resources
https://www.chelseagreen.com/2022/how-to-build-greenhouse-on-slope/
https://www.youtube.com/watch?v=LtqXK1Va7Ks
https://www.nrcs.usda.gov/wps/portal/nrcs/detailfull/national/programs/?cid=stelprdb1046250
Beiler’s Greenhouse Structures: 1333 Georgetown Rd Quarryville, 17566 PA 717-806-0553
https://extension.psu.edu/high-tunnel-structures-the-basics